What is Wrong With Hotel WiFi?
Using hotel Wi-Fi presents significant security risks due to its open and shared nature. Often, these networks lack robust encryption, making it easier for cybercriminals to intercept data transmitted over them. This vulnerability exposes users to potential threats such as man-in-the-middle attacks, where hackers can eavesdrop on or alter communications. Additionally, malicious actors may set up rogue access points that mimic the hotel’s network, tricking users into connecting and compromising their personal information. The lack of security controls and the high number of connected devices further increase the risk of malware infections and unauthorized access to sensitive data, making hotel Wi-Fi inherently unsafe for activities involving confidential information.
Hotels traditionally use the most basic passwords so that guests can fat finger type them in and yet successfully connect. These passwords sometimes rotate or change but it may take some time so a guest that knows the password can come back next week in their vehicle and sit in the parking lot and connect to the WiFi.
Hackers can exploit these insecure networks to steal your personal information, such as passwords, credit card numbers, and private messages. They can also inject malware into your device, which can lead to further data theft or damage to your system. These activities can result in identity theft, financial loss, and a breach of your personal privacy, making it crucial to be cautious when using any Wi-Fi.
How does a VPN Fix This?
Using a VPN over public Wi-Fi significantly enhances security by encrypting the data transmitted between your device and the VPN server. This encryption creates a secure tunnel that prevents cybercriminals from intercepting or tampering with your data, even on an unsecured network. VPNs mask your IP address, adding an extra layer of anonymity and protecting your online activities from prying eyes. This is especially crucial on public Wi-Fi, where the risk of man-in-the-middle attacks and data breaches is high. By ensuring that your data is encrypted and your connection is private, a VPN provides a robust defense against the inherent vulnerabilities of public Wi-Fi networks.
But I have a VPN app on my Mobile Device. Why do I need This?
Cool, good step when you are at the grocery store or local feed bag restaurant and you need to use their public WiFi. But it is you that needs to connect to the VPN. Your device may have already connected or re-connected to the public WiFi and it will start to transmit data in the background before you connect to the VPN. In those moments your apps may be logging in to your accounts transmitting your user credentials over public WiFi. And when you stay one or more nights at a hotel, your VPN may disconnect during the night when mobile devices try to save energy.
What is a Raspberry Pi?
The Raspberry Pi is a compact, powerful single-board computer that has revolutionized the world of DIY electronics and computing. Despite its small size, roughly equivalent to a deck of cards, it packs impressive computational power, making it suitable for a variety of applications. One notable feature is its ability to function as a Wi-Fi access point, providing a versatile solution for creating wireless networks in dangerous public environments. This capability, combined with its low cost and extensive support from a vibrant community, makes the Raspberry Pi an ideal tool for learning, experimenting, and implementing tech projects.
What You Need to Buy
First you will need a Raspberry Pi 4 or newer. At the time of writing this article the 5 is out but 4 is more than enough for what you need. For this article we used a Raspberry Pi 4 Model B 2GB which cost about $45 pre tax and shipping.
You can purchase one here

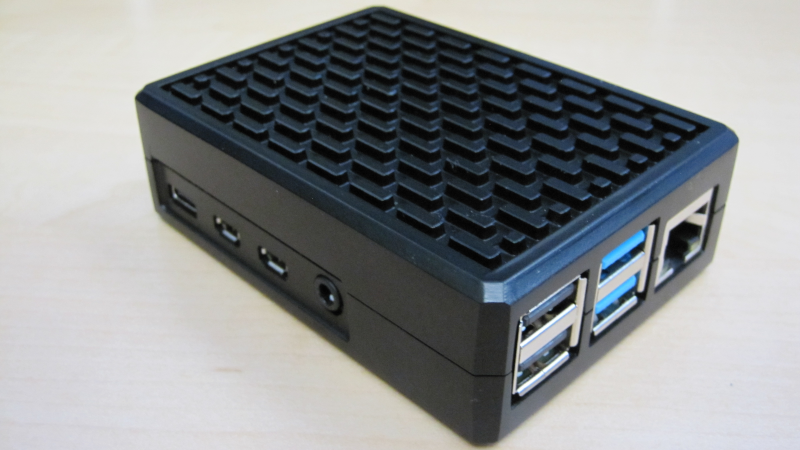
Next, you optionally may want a case. There are a variety of cases on Amazon or Ebay that are available for under $15. This case has heatsink rods that touch the chips and transfer heat to the top of the aluminum casing. Pretty cool right?
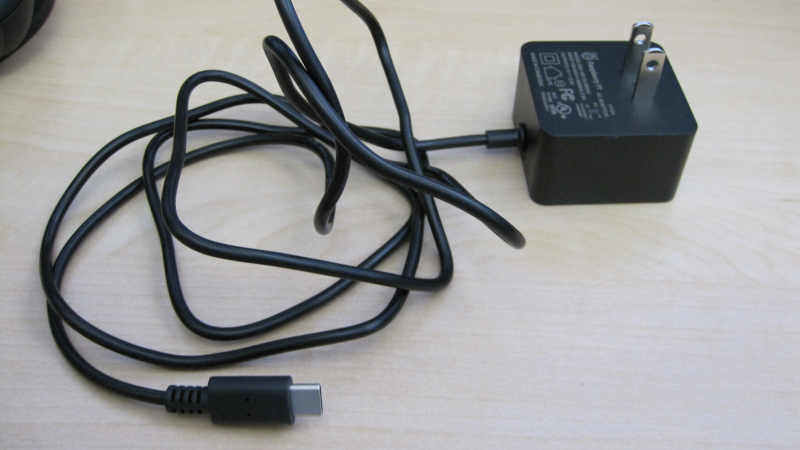
Next, you should purchase a power adapter that supplies the proper voltage and amps for your Raspberry Pi. For the Raspberry Pi 4 you will need a 5 volt 4 amp adapter. You will get a similar amount of power from a Macbook Pro USB-C port but other travel adapters may deliver higher or lower ratings. If you feel like spending a few bucks on a USB-C power tester, these can come in handy showing you the output of many USB-C ports.
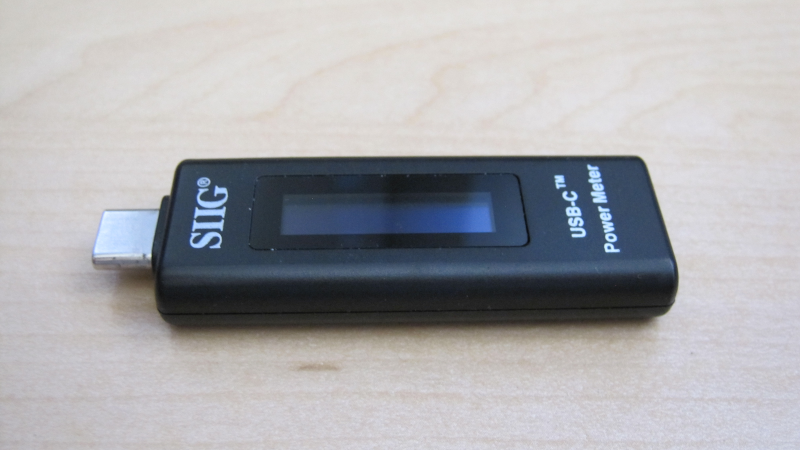
But for a mere $7 you can get the proper rated power adapter off Amazon which is the best path to take.
You can purchase one here
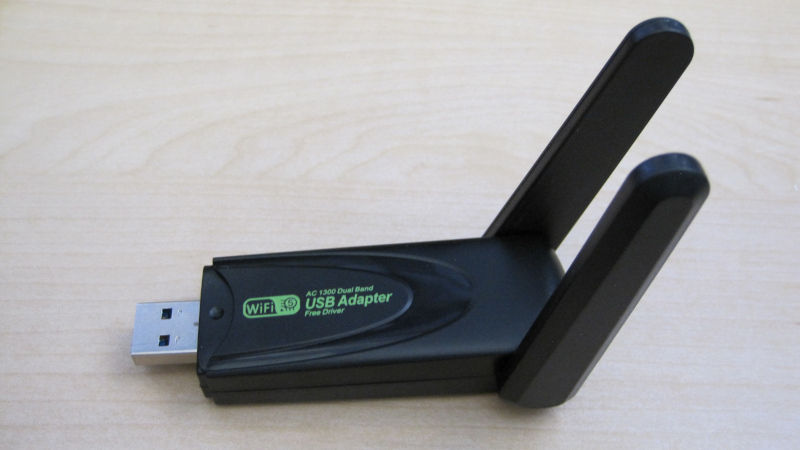
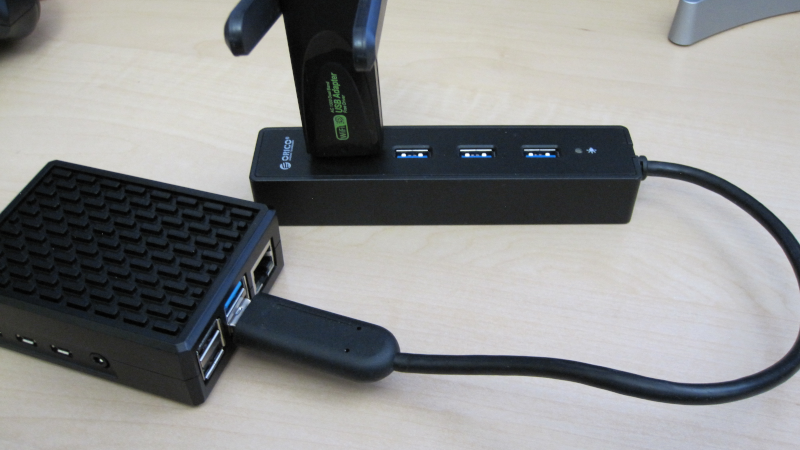
Next, you will need an additional WiFI adapter to act as your hotspot access point. This model QWPVPYJY uses the MT7612U chipset, which has drivers already included in Raspberry Pi OS. It will cost about $19.
You can purchase one here
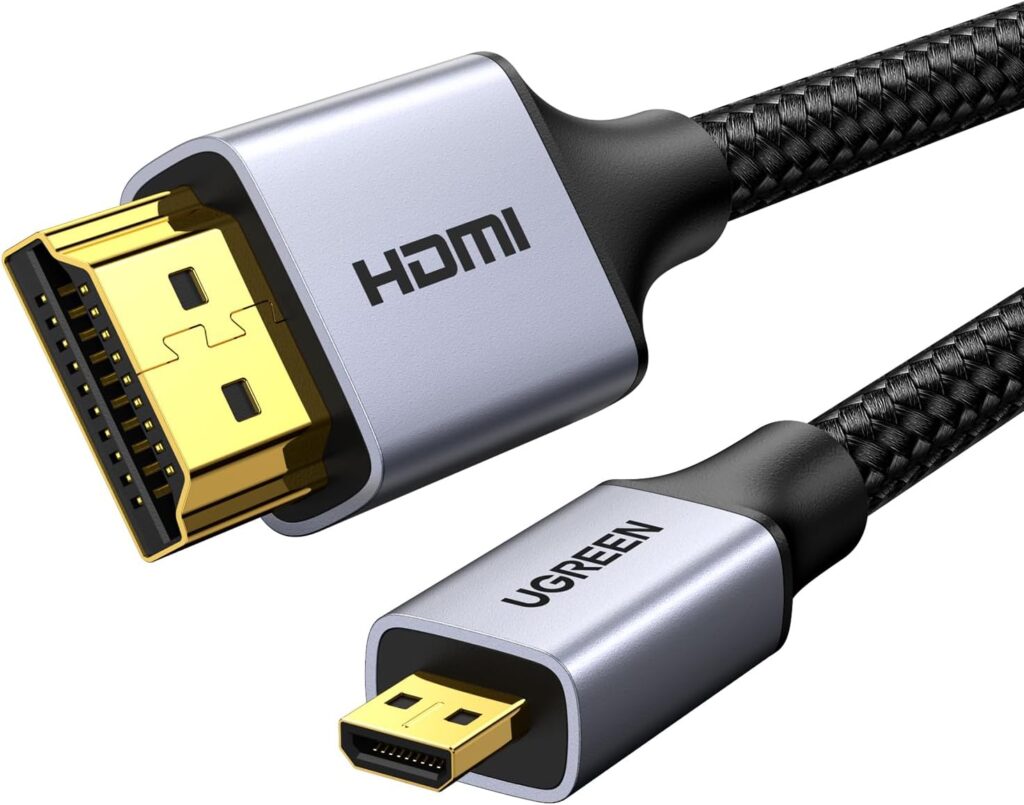
Next, you will need a 4K Micro HDMI to HDMI Cable which should cost about $9. This will allow you to connet the Raspberry Pi to a monitor or TV to show the desktop display. This will be very helpful during the initial setup but you may not need this during your travel time at the hotels. Because one end is a micro HDMI port, it won’t be useful for your phone, tablet or laptop. However in many hotels you can connect an HDMI cable to their room TV and you can stream video or play games using their equipment. With that in mind, you can connect your Raspberry Pi to the hotel TV if needed, so you may want to travel with this cable.
You can purchase one here
Next, you will need a microSD card to use as the hard drive for the Raspberry Pi. The operating system and your user data will be saved to this microSD card which makes things interesting because you can swap these out and boot under a number of different saved operating system configurations. Grab at least a 32 GB card, which should cost about $13.
You can purchase one here

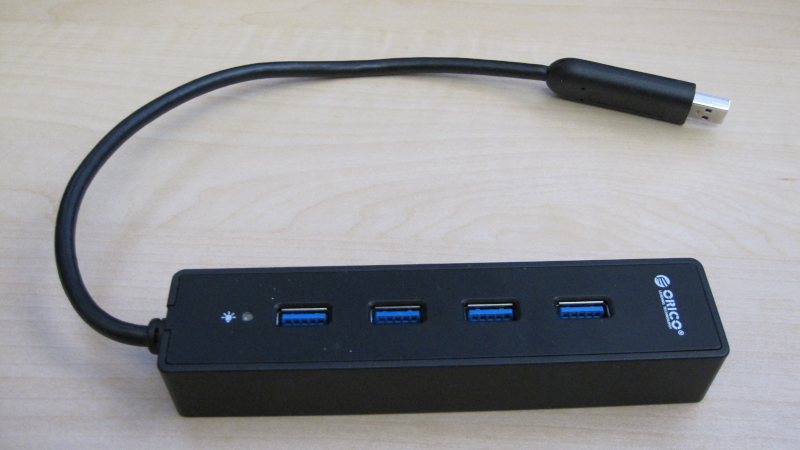
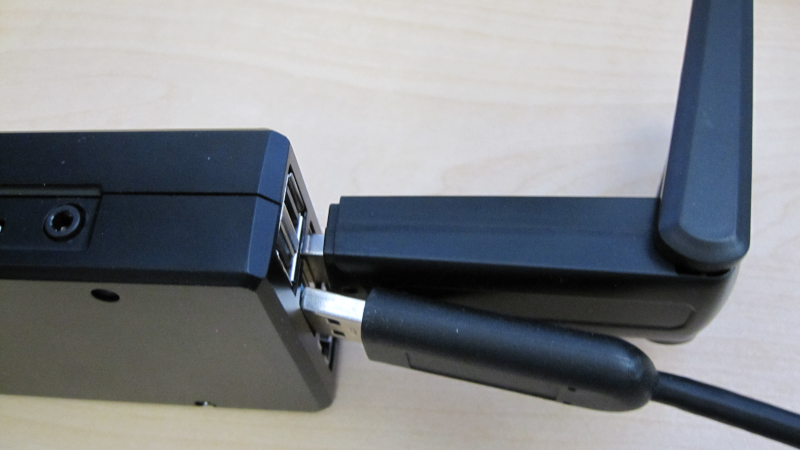
Next for the initial setup, a USB-A hub will come in handy. As you can see in the images, the wifi adapter is too large to allow the other USB port to be used. The hub solves that issue. You will also need a USB keyboard and mouse.
Finally, after setup is complete and you are ready to travel, a bluetooth keyboard and mouse will be helpful. You can use the same devices for your tablet or laptop that you might already travel with.

Initial Setup
This is the full getting started guide. Please read through this just to get completely familiar with things. Once you have all the items purchased and before you plug in the power, you need to provision the microSD card. You will download an app to your desktop or laptop and run the application. You will need to connect the microSD card to your desktop or laptop to provision the Raspberry Pi operating system. Follow the steps and use a 64 bit operating system install. When prompted, you should select the Edit Settings button to set your username and password along with anything else you would like to pre-configure. For this setup we are using WiFi as the main networking rather than the ethernet cable. You can use ethernet if you want, but because the main point is a WiFi configuration, go ahead and add your WiFi SSID and password to the install settings. Also make sure to enable SSH. Once this is complete, you can insert the microSD card into the slot on the bottom of the Raspberry Pi motherboard.
Now you can connect your HDMI cable, USB hub with the keyboard, mouse and the Wifi adapter. On the Raspberry Pi 4 there are 2 micro HDMI ports, use the port next to the USB-C adapter. Plug in the power adapter and boot this baby up!
Here is Where it Gets Technical
This is the official guide to follow for most of the setup. Please give this a good read through but keep in mind it is from the context of remote administration over SSH. You can use your HDMI cable and USB keyboard + mouse at this point to see the desktop and navigate around. In the upper right section of the status bar you will see the WiFi icon. From there you can see the IP address of your Raspberry Pi. Use this IP address to open a terminal on another computer and connect to your Raspberry Pi.
If you are having trouble finding your Raspberry Pi on your network, read this information to locate your device.
Setup the WiFi Hotspot
Running the nmcli device command while the USB WiFi adapter is connected will list it as wlan1. So at this point you will have the built in WiFi adapter as wlan0 that will be connected to your WiFi and the external USB adapter as wlan1.
europheus@raspberrypi:~ $ nmcli device
DEVICE         TYPE      STATE                   CONNECTION
wlan0          wifi      connected               preconfigured
lo             loopback  connected (externally)  lo
wlan1          wifi      disconnected            --
p2p-dev-wlan0  wifi-p2p  disconnected            --
p2p-dev-wlan1  wifi-p2p  disconnected            --
eth0           ethernet  unavailable             --
Next you will run this command that will create a hotspot on the external USB adapter Wifi. Keep in mind the internal WiFi wlan0 will not be impacted, it will stay connected to the WiFi you configured. Pick a creative SSID and a secure password for your hotspot WiFi.
sudo nmcli device wifi hotspot ssid YOURSSID password 'yourpasssword' ifname wlan1
Now list the devices again an you will see wlan1 is now a hotspot.
europheus@raspberrypi:~ $ nmcli device
DEVICE         TYPE      STATE                   CONNECTION
wlan1          wifi      connected               Hotspot
wlan0          wifi      connected               preconfigured
lo             loopback  connected (externally)  lo
p2p-dev-wlan0  wifi-p2p  disconnected            --
p2p-dev-wlan1  wifi-p2p  disconnected            --
eth0           ethernet  unavailable             --
Another useful command is nmcli connection. The wlan0 and wlan1 should be in a green text color when they are in a good state.
europheus@raspberrypi:~ $ nmcli connection
NAME                UUID                                  TYPE      DEVICE
Hotspot             47a0836f-ff1f-xxxx-XXXX-xxxxx  wifi      wlan1
preconfigured       fa9854e5-f1da-xxxx-XXXX-xxxxx  wifi      wlan0
lo                  9282b0c1-2bf5-xxxx-XXXX-xxxxx  loopback  lo
Wired connection 1  5b2e9dd8-a112-xxxx-XXXX-xxxxx  ethernet  --
Next you want to set these connection properties. Not sure what these are but the guide recommended this step.
sudo nmcli connection modify 47a0836f-ff1f-xxxx-XXXX-xxxxx connection.autoconnect yes connection.autoconnect-priority 100
You should also make sure you have these packages installed.
europheus@raspberrypi:~ $ sudo apt install dnsmasq NetworkManager-wifi
There is an optional step in the Raspberry Pi setup guide to configure a webpage that allows you to configure the WiFi via a browser on an external device. We haven’t tested this out and initially the page was not reachable. Check back soon for updates.
sudo apt install python3-flask
mkdir ~/wifi-portal
cd ~/wifi-portal
sudo nano app.py
Add contents from Raspberry Pi hotspot setup guide.
Testing Connections
Now your hotspot is configured and you should try to connect your personal devices to the new SSID that you created. You may encounter problems where some devices such Apple laptops or tablets may fail to connect however Android devices connect without issue. If you run into failures to connect to the hotspot, try making these adjustments. Before you make changes you will want to make a backup of the configuration file. You can also cat this file to see the current configuration settings.
sudo cp /etc/NetworkManager/system-connections/Hotspot.nmconnection /etc/NetworkManager/system-connections/Hotspot.nmconnection.bak
First adjust the proto value from rsn to wpa. This tends to resolve Apple connection issues. You will need to change the GUID to the value that matches your external USB connector.
sudo nmcli connection modify 47a0836f-ff1f-xxxx-XXXX-xxxxx 802-11-wireless-security.proto wpa
Apply the changes then restart the network services. Your current connection will stay connected. Once restarted, try connecting again with the problem devices.
sudo systemctl restart NetworkManager
If that does not work, try setting the key type to sae.
sudo nmcli connection modify 47a0836f-ff1f-xxxx-XXXX-xxxxx 802-11-wireless-security.key-mgmt sae
Once again, apply the changes then restart the network services. Your current connection will stay connected. Once restarted, try connecting again with the problem devices.
sudo systemctl restart NetworkManager
VPN setup
After setting up your hotspot, you can now configure your VPN client connection. This will run over the main built in WiFi and all connections over the secondary hotspot WiFi will route over the VPN. First install these packages.
sudo apt-get install openvpn network-manager-openvpn
Next you will need to obtain an Open VPN configuration file from your VPN provider. This file contains the connection information along with the certificates used for authentication. These are usually paid services and in this case we are using Trust zone.
sudo nmcli connection import type openvpn file Trust.Zone-United-States-EAST.ovpn
This will create a new configuration file similar to the hotspot file. You will need to manually edit this file to set up your username and password.
sudo nano /etc/NetworkManager/system-connections/Trust.Zone-United-States-EAST.nmconnection
Under [vpn] add
username=YOURUSERNAME
also change password-flags=1 to password-flags=0
Under [vpn] section, add
[vpn-secrets]
password=YOURPASSWORD
Save the changes, then restart the network manager.
sudo systemctl restart NetworkManager
Next you can connect to the VPN either using the gui desktop or over command line.
sudo nmcli con up id Trust.Zone-United-States-EAST
After connection, all data sent over wlan1 will route through the VPN. You can test this by connecting to one of the many WHAT IS MY IP ADDRESS websites. Do this before and after enabling the VPN connection to see that you have a new IP address when VPN is connected. Test this from your mobile devices that are connected to the Raspberry Pi.