Kernel panic – not syncing: VFS: Unable to mount root fs on unknown-block(0,0)
So that is a scary error message to see on a server, and more so on a remote server. This error message appeared after updating and rebooting a Fedora 37 server. This was a remote server droplet at DigitalOcean which could only be accessed by the remote console. On the remote console it was clear that boot up failed with a kernel panic.
At first glance this appears to be a file system issue, and for you that may be the case. Check if there is a volume that is full and you just need to free up some space. Check if a GUID of the boot valume has changed, and the grub configuration file references an invalid GUID. Or maybe, the file system is not the problem, and the update of the kernel just simply failed.
In this post we will go over the case where a kernel update simply fails to install. As this server is a DigitalOcean droplet, the recovery steps will involve several DigitalOcean specific admin console screens.
First see if the admin console allows you to select the previous kernel to boot from. This would be your easy solution to recover your server and have it boot successfully. Once it boots you can try to fix the update to the new kernel by re-installing it. However you may find that the kernel selection option is not available and in this case, you will need to perform some manual steps.

If you cannot select a previous kernel, you need to enter Recovery Mode for your DigitalOcean droplet. This will run a lightweight Ubuntu recovery OS that will allow you to try and access to your server via command line. You will also be able to transfer any files off the server incase you want to drop the server and start over fresh.
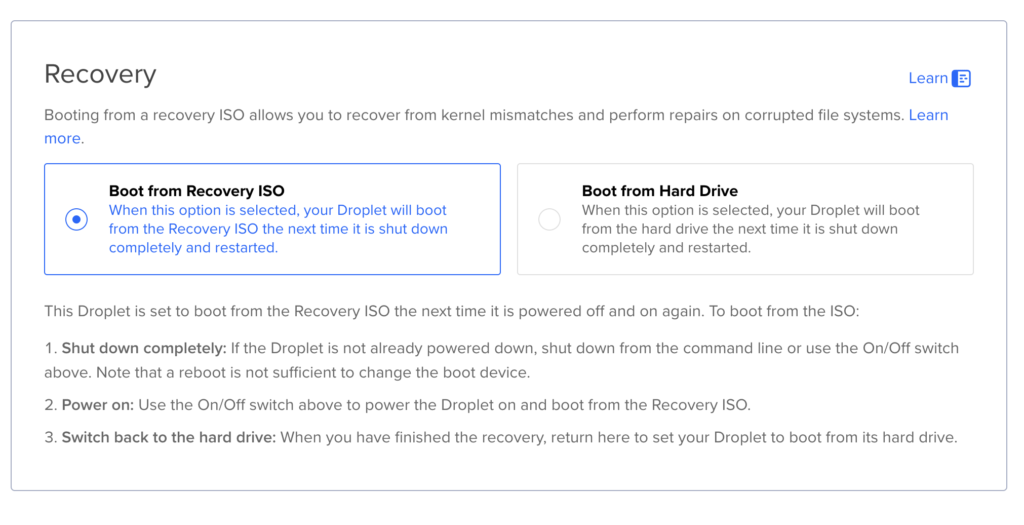
Power down your droplet, then select Boot from recovery ISO. Power your droplet back on again and you should be able to click the console link in the upper right corner. You will see the recovery system boot then present you with a menu as shown below.

Options 1 and 6 are going to be the only useful things on this menu. Many of the other options will not work for a Fedora droplet. So start by selecting option 1 to mount your file system. After that select option 6 to enter a bash shell. Once in the shell, you can run the following commands.
These instructions involve volumes vda2 and vda5. These names may vary depending on your droplet however you should have volumes available that will contain the folders of interest. It is worth pointing out that the following mount commands are temporary and can be reverted by restarting the recovery ISO.
Run this command to see the devices for mounting.
lsblk -f
mkdir /mnt/sysimage
mount -o subvol=root /dev/vda5 /mnt/sysimage
mount /dev/vda2 /mnt/sysimage/boot
mount /dev/vda3 /mnt/sysimage/boot/efi
mount -B /dev /mnt/sysimage/dev
mount -B /proc /mnt/sysimage/proc
mount -B /sys /mnt/sysimage/sys
You can now use this command to re-generate your grub2 config file which could solve your problem.
cd sbin
grub2-mkconfig -o /boot/grub2/grub.cfg
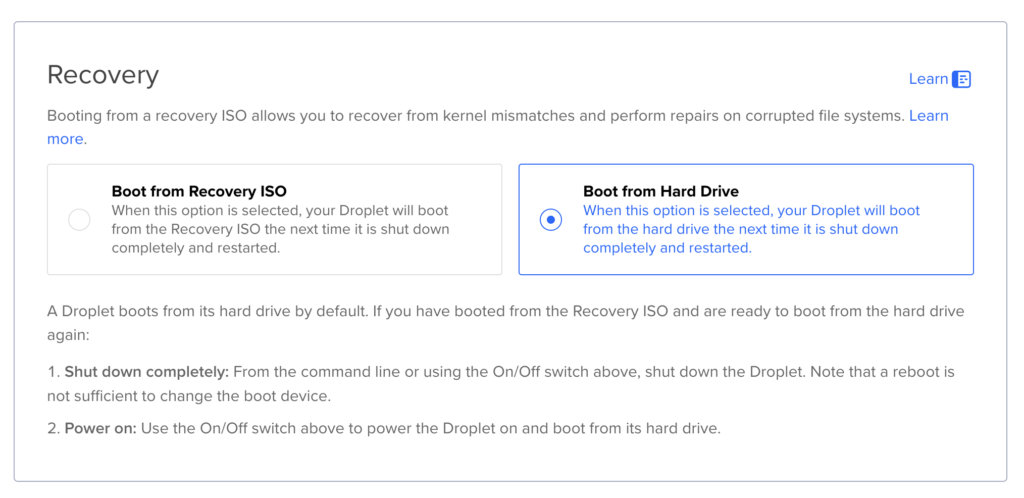
After you run grub2-mkconfig, you should be able to boot back into normal mode. Power off your droplet, then in the recovery mode screen select Boot from hard drive. Then click power on.
If your server did not boot, repeat the recovery disk boot and mounting steps above. You may need to re-install or update the kernel. You will likely need to temporarily update DNS to access RPM repositories.
mv /etc/resolv.conf /etc/resolv.conf.bak
vi /etc/resolv.conf
nameserver 9.9.9.9
Now you can check for the latest installed kernel and try to re-install it.
rpm -qa | grep kernel
dnf reinstall kernel-core-6.13.8-200.fc41.x86_64
Or you can update the server and see if a new kernel is available.
dnf update
If for some reason you cannot run grub2-mkconfig you try to instruct grub to boot up with the previous kernel. Now that you have file system access from a recovery OS, you can make these modifications to your file system then reboot back in normal mode.
To get started, you will need to find the GUID and version of the previous kernel version. Once you have that, you can edit grubenv to use the previous version.
cd boot
Next get a list of the kernels available and find the second to latest version. In this example that would be 364c379c9e9948ebb34a44c8742d37fa-6.5.12-100.fc37.x86_64
ls -la loader/entries/

total 20
drwx------. 2 root root 4096 Feb 18 11:45 .
drwxr-xr-x. 3 root root   21 Apr  3  2022 ..
-rw-r--r--. 1 root root  407 Apr  3  2022 364c379c9e9948ebb34a44c8742d37fa-0-rescue.conf
-rw-r--r--. 1 root root  330 Nov 19 15:09 364c379c9e9948ebb34a44c8742d37fa-6.5.10-100.fc37.x86_64.conf
-rw-r--r--. 1 root root  330 Dec 30 14:27 364c379c9e9948ebb34a44c8742d37fa-6.5.12-100.fc37.x86_64.conf
-rw-r--r--. 1 root root  326 Feb 18 11:45 364c379c9e9948ebb34a44c8742d37fa-6.7.4-200.fc39.x86_64.conf
Next, make a backup of grubenv then edit the file changing the saved_entry value to the second to latest kernel version. In this example that would be 364c379c9e9948ebb34a44c8742d37fa-6.5.12-100.fc37.x86_64
cp grub2/grubenv grub2/grubenv.bak
cat grub2/grubenv

# GRUB Environment Block
# WARNING: Do not edit this file by tools other than grub-editenv!!!
saved_entry=364c379c9e9948ebb34a44c8742d37fa-6.7.4-200.fc39.x86_64
boot_success=1
boot_indeterminate=0
###############################################################################
After you make these changes, you should be able to boot back into normal mode. Power off your droplet, then in the recovery mode screen select Boot from hard drive. Then click power on.
With any luck your server will boot back up in the previous kernel. Yay! so now you need to fix the failed upgraded kernel. To do this, find the most recent kernel package and have dnf reinstall it.
dnf list installed | grep kernel\*

abrt-addon-kerneloops.x86_64                   2.17.1-3.fc39                          @fedora
kernel.x86_64                                  6.5.10-100.fc37                        @updates
kernel.x86_64                                  6.5.12-100.fc37                        @updates
kernel.x86_64                                  6.7.4-200.fc39                         @updates
kernel-core.x86_64                             6.5.10-100.fc37                        @updates
kernel-core.x86_64                             6.5.12-100.fc37                        @updates
kernel-core.x86_64                             6.7.4-200.fc39                         @updates
kernel-headers.x86_64                          6.7.3-200.fc39                         @updates
kernel-modules.x86_64                          6.5.10-100.fc37                        @updates
kernel-modules.x86_64                          6.5.12-100.fc37                        @updates
kernel-modules.x86_64                          6.7.4-200.fc39                         @updates
kernel-modules-core.x86_64                     6.5.10-100.fc37                        @updates
kernel-modules-core.x86_64                     6.5.12-100.fc37                        @updates
kernel-modules-core.x86_64                     6.7.4-200.fc39                         @updates
kernel-srpm-macros.noarch                      1.0-20.fc39                            @fedora
libreport-plugin-kerneloops.x86_64             2.17.11-3.fc39                         @fedora

dnf reinstall kernel-core-6.7.4-200.fc39.x86_64
re-install kernel instructions: